George Profenza
From PhysicalComputing
Contents |
Sensor Buzzer Toy + WaveShield Toy
Aim
The Aim was to modify sounds by using sensors.
Ideally I would modify the pitch/volume of WAV files playing.
A Wave Shield would be use for the task.
Reseach:
Existing stuff found online looked pretty fun:
Wave Shield Fun
Old School Noise
More 8 bit joy
User Scenario
Although I had bigger plans that would involve drawing robots,
I had to settle for something less dramatic.
No gallery, no installation, just plain fun with old school noises...Yeah! I still play old school NES games!
Got a problem ?!
Development Process
I recently got my hands on a decent camera, so here are a few pictures from the development process:
Completed Wave Shield:
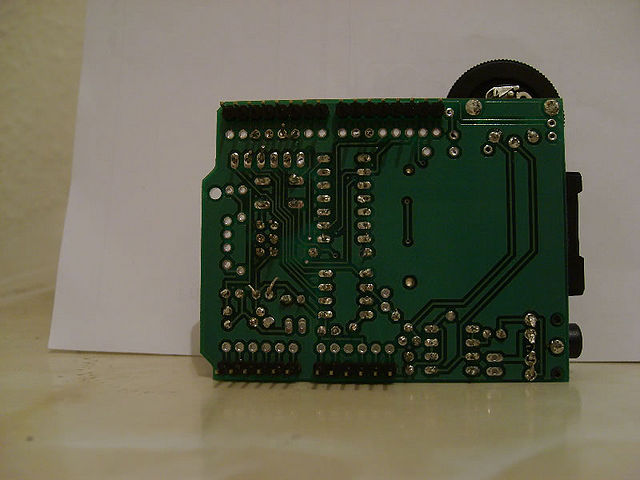
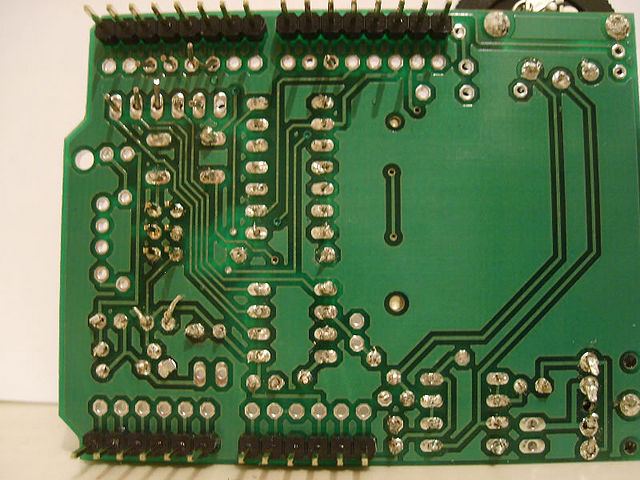
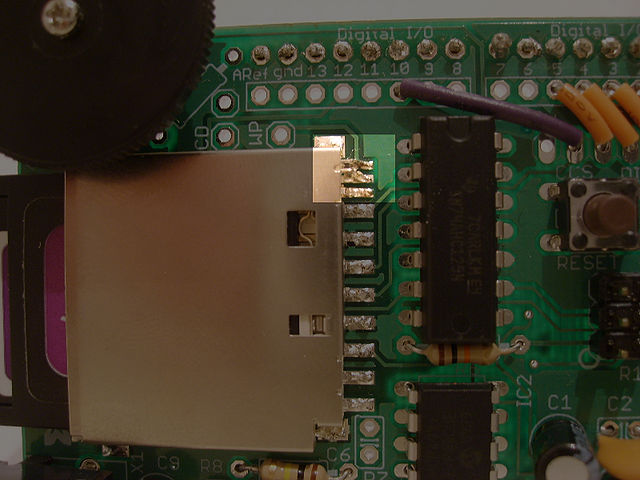
Smooth soldering action going on.
I don't see why there's not hit song called "Solder Boy!" :)
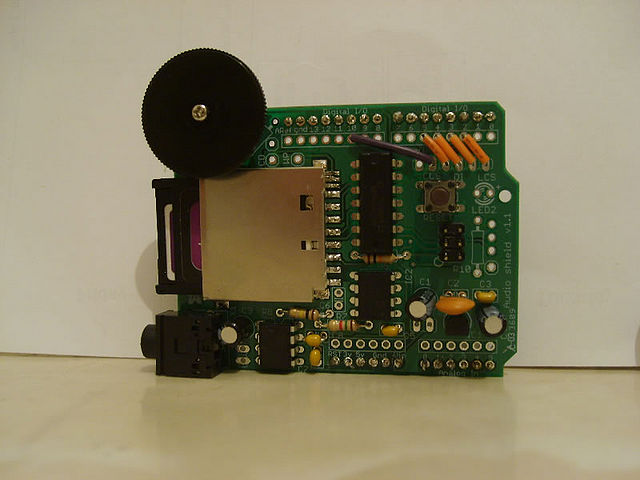
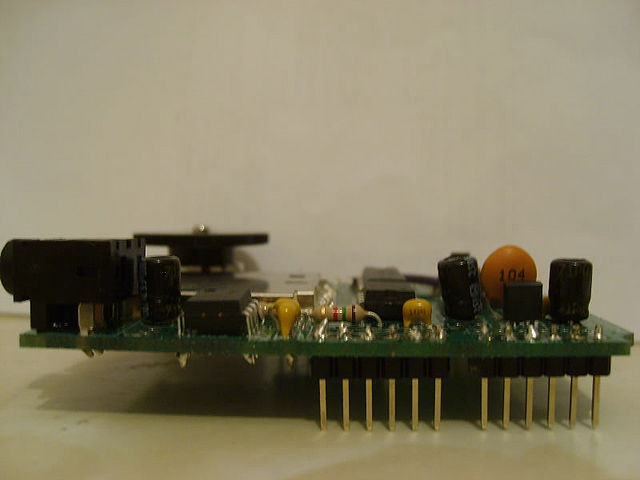
The huge 104 coded capacitor I had run to maplins to get, my kit missed 1.
The lovely WaveHC librarie problems:
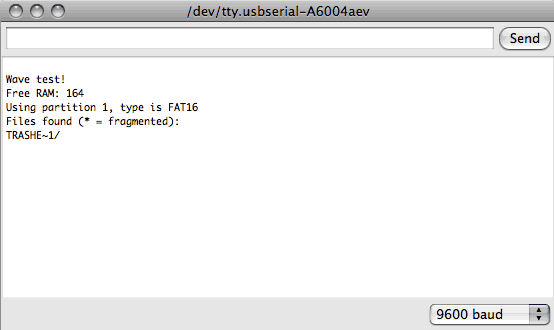
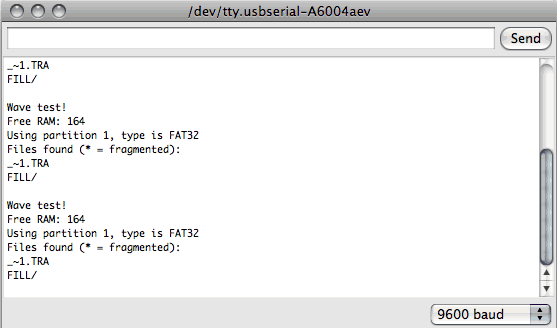
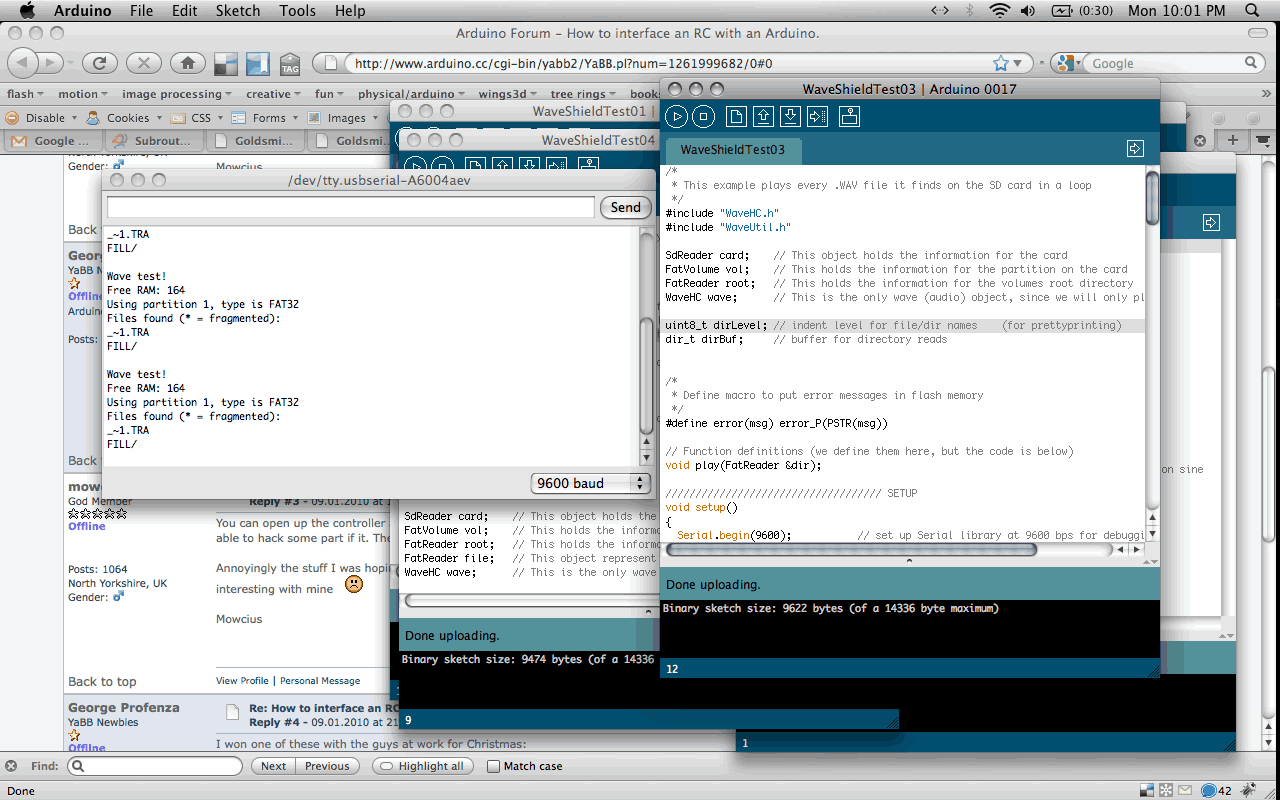
Problems with memory, not all files were read,
no chance to play a .wav
Never the less I settled for the simple approach:
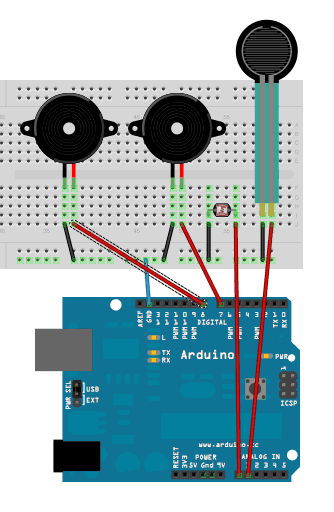
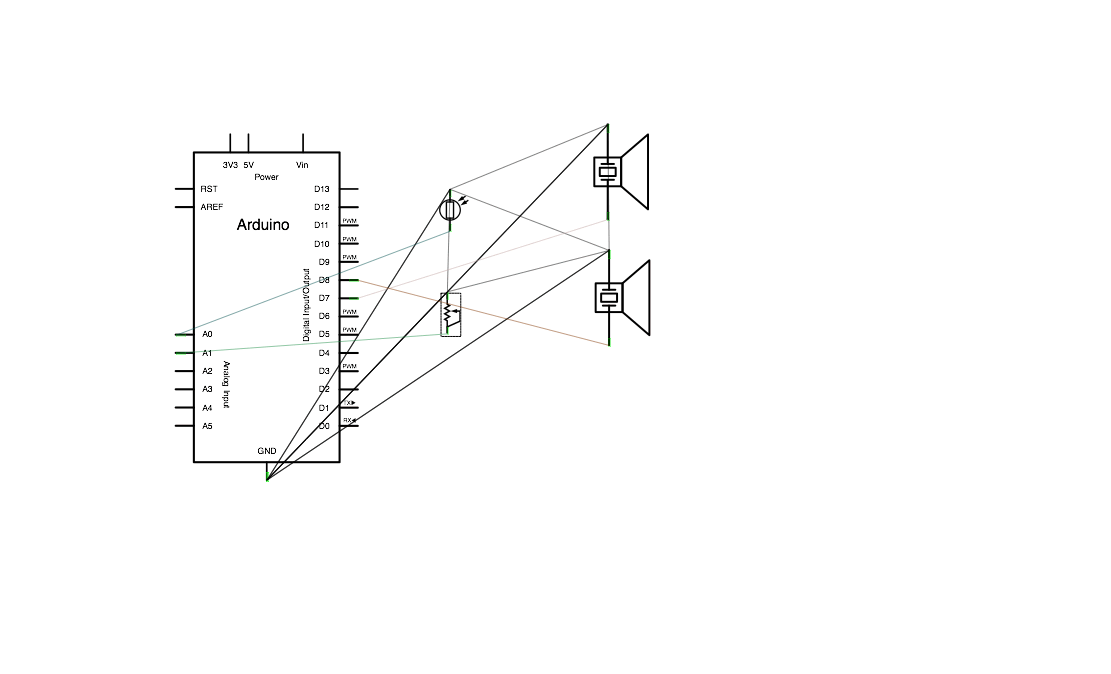
Using a capacitive sensor, an Light Dependent Resistor(LDR),
a speaker and a Piezzo Buzzer I managed to get some noise using the
Tone Library.
The code looks like this:
#include <Tone.h>
//Tone objects
Tone beeperSmall;            //small buzzer
Tone beeperBig;              //big buzzer
//pin setup
int capacitiveSensorPin = 0; //press pin
int ldrSensorPin        = 1; //LDR pin
/*int redPin              = 12;//red LED
int uvPin               = 11;//PWM UV LED
float duty              = 0; //PWM duty
float angle             = 0; //angle for cycle
float rad5              = PI/18;//for uvLED sine
float redValue          = 0;    //for red LED*/
//SENSOR READING
int vals[10];        //Declared our 10 position averaging array
int capacitiveValue = 0;     //variable to store the value coming frm the center
int ldrValue = 0;

void setup(){
  beeperSmall.begin(8);
  beeperBig.begin(7);
  //pinMode(uvPin,OUTPUT);
  //pinMode(redPin,OUTPUT);
  Serial.begin(9600);
   for (int i=0;i<10;i++)
  {
    vals[i] = 0;        //initialize the array
  }
}

void loop(){
  //analogRead gets values from 0 to 1023
  capacitiveValue = average(analogRead(capacitiveSensorPin));
  ldrValue = analogRead(ldrSensorPin);
  //let's keep noiseMaker's pitch up to 1000
  beeperSmall.play(capacitiveValue - 23);
  beeperBig.play(ldrValue);
  Serial.println(capacitiveValue);
  Serial.println(ldrValue);
  //PWM
 /* angle += rad5;
  if(angle > TWO_PI) angle = 0;
  duty = abs(sin(angle) * 255);
  analogWrite(uvPin,capacitiveValue*4);
  redValue = random(0,100);
  if(redValue > 75) digitalWrite(redPin,HIGH);
  else              digitalWrite(redPin,LOW);
  delay(250);*/
}

int average(int newVal)
{
  int total = 0;
  for (int i = 9; i > 0; i--)    //shift values by 1
  {
    vals[i] = vals[i-1];
    total+=vals[i];
  }
  vals[0] = newVal;//add the newVal
  total += vals[0];//sum it up
  return total/=10;//divide and send
}
Final Outcome:
Old school noise is the result:
Lessons learned:
- fail early
- fail often
- keep trying
The Obvious:
I suck at time management
Update:
Disclaimer: I am adding new content as I have not given up
the wave shield that was almost done. Due to the fact that the display
date was delayed I have taken advantage to update this page. Any member
of the teaching staff may ignore the following content. This is for the
sake of documentation.
Ok, Gert was kind
enough to lend me an Atmel328 chip, as I had a 168 (50% less memory, older version).
Apparently downgrading a Duemilanove board to a 168 chip is straight forward and
there is an option in the Board list within the Arduino IDE.
Not the same for upgrading a Diecimila with a 328 chip. This doesn't make much sense
to me as more than likely you'll upgrade an older board with a newer chip rather than
the other way around.
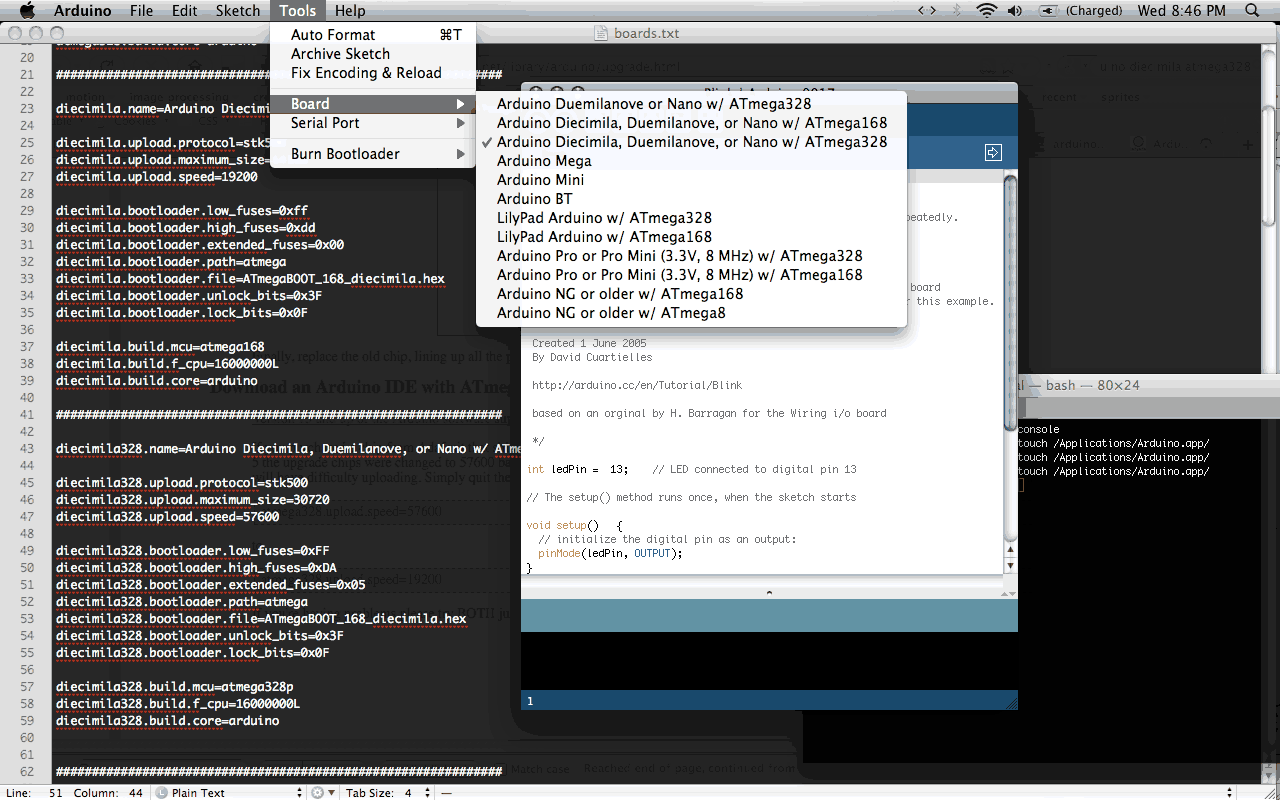
In case anyone one's to do this, you need to create a board definition in the boards.txt file within Arduino's hardware folder. That is slightly more than the explanations on the LadyAda site.
In case anyone needs this, here are my custom boards definitions. I defined the diecimila328 by using most of the diecimila definition,
but using atmega328's definitions for maximum upload speed, (baud)speed, low, high and extended fuses and the mcu. Here's how it looks:
##############################################################

atmega328.name=Arduino Duemilanove or Nano w/ ATmega328

atmega328.upload.protocol=stk500
atmega328.upload.maximum_size=30720
atmega328.upload.speed=57600

atmega328.bootloader.low_fuses=0xFF
atmega328.bootloader.high_fuses=0xDA
atmega328.bootloader.extended_fuses=0x05
atmega328.bootloader.path=atmega
atmega328.bootloader.file=ATmegaBOOT_168_atmega328.hex
atmega328.bootloader.unlock_bits=0x3F
atmega328.bootloader.lock_bits=0x0F

atmega328.build.mcu=atmega328p
atmega328.build.f_cpu=16000000L
atmega328.build.core=arduino

##############################################################

diecimila.name=Arduino Diecimila, Duemilanove, or Nano w/ ATmega168

diecimila.upload.protocol=stk500
diecimila.upload.maximum_size=14336
diecimila.upload.speed=19200

diecimila.bootloader.low_fuses=0xff
diecimila.bootloader.high_fuses=0xdd
diecimila.bootloader.extended_fuses=0x00
diecimila.bootloader.path=atmega
diecimila.bootloader.file=ATmegaBOOT_168_diecimila.hex
diecimila.bootloader.unlock_bits=0x3F
diecimila.bootloader.lock_bits=0x0F

diecimila.build.mcu=atmega168
diecimila.build.f_cpu=16000000L
diecimila.build.core=arduino

##############################################################

diecimila328.name=Arduino Diecimila, Duemilanove, or Nano w/ ATmega328

diecimila328.upload.protocol=stk500
diecimila328.upload.maximum_size=30720
diecimila328.upload.speed=57600

diecimila328.bootloader.low_fuses=0xFF
diecimila328.bootloader.high_fuses=0xDA
diecimila328.bootloader.extended_fuses=0x05
diecimila328.bootloader.path=atmega
diecimila328.bootloader.file=ATmegaBOOT_168_diecimila.hex
diecimila328.bootloader.unlock_bits=0x3F
diecimila328.bootloader.lock_bits=0x0F

diecimila328.build.mcu=atmega328p
diecimila328.build.f_cpu=16000000L
diecimila328.build.core=arduino


##############################################################

mega.name=Arduino Mega

mega.upload.protocol=stk500
mega.upload.maximum_size=126976
mega.upload.speed=57600

mega.bootloader.low_fuses=0xFF
mega.bootloader.high_fuses=0xDA
mega.bootloader.extended_fuses=0xF5
mega.bootloader.path=atmega
mega.bootloader.file=ATmegaBOOT_168_atmega1280.hex
mega.bootloader.unlock_bits=0x3F
mega.bootloader.lock_bits=0x0F

mega.build.mcu=atmega1280
mega.build.f_cpu=16000000L
mega.build.core=arduino

##############################################################

mini.name=Arduino Mini

mini.upload.protocol=stk500
mini.upload.maximum_size=14336
mini.upload.speed=19200

mini.bootloader.low_fuses=0xff
mini.bootloader.high_fuses=0xdd
mini.bootloader.extended_fuses=0x00
mini.bootloader.path=atmega
mini.bootloader.file=ATmegaBOOT_168_ng.hex
mini.bootloader.unlock_bits=0x3F
mini.bootloader.lock_bits=0x0F

mini.build.mcu=atmega168
mini.build.f_cpu=16000000L
mini.build.core=arduino

##############################################################

bt.name=Arduino BT

bt.upload.protocol=stk500
bt.upload.maximum_size=14336
bt.upload.speed=19200
bt.upload.disable_flushing=true

bt.bootloader.low_fuses=0xff
bt.bootloader.high_fuses=0xdd
bt.bootloader.extended_fuses=0x00
bt.bootloader.path=bt
bt.bootloader.file=ATmegaBOOT_168.hex
bt.bootloader.unlock_bits=0x3F
bt.bootloader.lock_bits=0x0F

bt.build.mcu=atmega168
bt.build.f_cpu=16000000L
bt.build.core=arduino

##############################################################

lilypad328.name=LilyPad Arduino w/ ATmega328

lilypad328.upload.protocol=stk500
lilypad328.upload.maximum_size=30720
lilypad328.upload.speed=57600

lilypad328.bootloader.low_fuses=0xFF
lilypad328.bootloader.high_fuses=0xDA
lilypad328.bootloader.extended_fuses=0x05
lilypad328.bootloader.path=atmega
lilypad328.bootloader.file=ATmegaBOOT_168_atmega328_pro_8MHz.hex
lilypad328.bootloader.unlock_bits=0x3F
lilypad328.bootloader.lock_bits=0x0F

lilypad328.build.mcu=atmega328p
lilypad328.build.f_cpu=8000000L
lilypad328.build.core=arduino

##############################################################

lilypad.name=LilyPad Arduino w/ ATmega168

lilypad.upload.protocol=stk500
lilypad.upload.maximum_size=14336
lilypad.upload.speed=19200

lilypad.bootloader.low_fuses=0xe2
lilypad.bootloader.high_fuses=0xdd
lilypad.bootloader.extended_fuses=0x00
lilypad.bootloader.path=lilypad
lilypad.bootloader.file=LilyPadBOOT_168.hex
lilypad.bootloader.unlock_bits=0x3F
lilypad.bootloader.lock_bits=0x0F

lilypad.build.mcu=atmega168
lilypad.build.f_cpu=8000000L
lilypad.build.core=arduino

##############################################################

pro328.name=Arduino Pro or Pro Mini (3.3V, 8 MHz) w/ ATmega328

pro328.upload.protocol=stk500
pro328.upload.maximum_size=30720
pro328.upload.speed=57600

pro328.bootloader.low_fuses=0xFF
pro328.bootloader.high_fuses=0xDA
pro328.bootloader.extended_fuses=0x05
pro328.bootloader.path=atmega
pro328.bootloader.file=ATmegaBOOT_168_atmega328_pro_8MHz.hex
pro328.bootloader.unlock_bits=0x3F
pro328.bootloader.lock_bits=0x0F

pro328.build.mcu=atmega328p
pro328.build.f_cpu=8000000L
pro328.build.core=arduino

##############################################################

pro.name=Arduino Pro or Pro Mini (3.3V, 8 MHz) w/ ATmega168

pro.upload.protocol=stk500
pro.upload.maximum_size=14336
pro.upload.speed=19200

pro.bootloader.low_fuses=0xc6
pro.bootloader.high_fuses=0xdd
pro.bootloader.extended_fuses=0x00
pro.bootloader.path=atmega
pro.bootloader.file=ATmegaBOOT_168_pro_8MHz.hex
pro.bootloader.unlock_bits=0x3F
pro.bootloader.lock_bits=0x0F

pro.build.mcu=atmega168
pro.build.f_cpu=8000000L
pro.build.core=arduino

##############################################################

atmega168.name=Arduino NG or older w/ ATmega168

atmega168.upload.protocol=stk500
atmega168.upload.maximum_size=14336
atmega168.upload.speed=19200

atmega168.bootloader.low_fuses=0xff
atmega168.bootloader.high_fuses=0xdd
atmega168.bootloader.extended_fuses=0x00
atmega168.bootloader.path=atmega
atmega168.bootloader.file=ATmegaBOOT_168_ng.hex
atmega168.bootloader.unlock_bits=0x3F
atmega168.bootloader.lock_bits=0x0F

atmega168.build.mcu=atmega168
atmega168.build.f_cpu=16000000L
atmega168.build.core=arduino

##############################################################

atmega8.name=Arduino NG or older w/ ATmega8

atmega8.upload.protocol=stk500
atmega8.upload.maximum_size=7168
atmega8.upload.speed=19200

atmega8.bootloader.low_fuses=0xdf
atmega8.bootloader.high_fuses=0xca
atmega8.bootloader.path=atmega8
atmega8.bootloader.file=ATmegaBOOT.hex
atmega8.bootloader.unlock_bits=0x3F
atmega8.bootloader.lock_bits=0x0F

atmega8.build.mcu=atmega8
atmega8.build.f_cpu=16000000L
atmega8.build.core=arduino
Here is a screen shot of the updated Boards list in the Arduino IDE:
Ok, back to the wave shield. I have finally got it to work, all the programming
issues were because my chip was running out of memory while reading the directory
list of an SD, not to mention play a file. Apparently all the soldering was fine
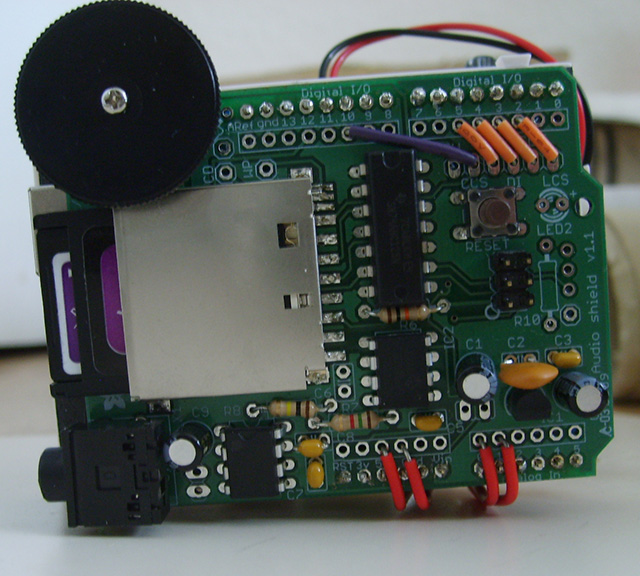
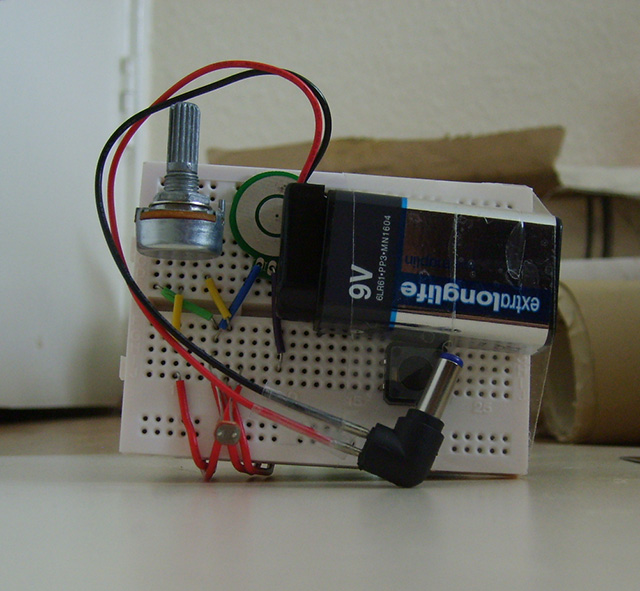
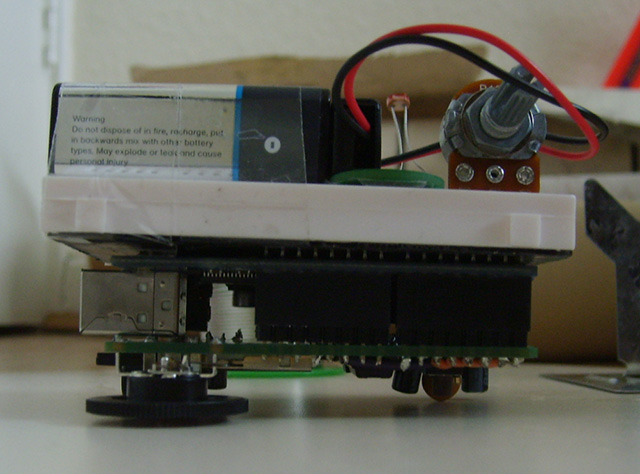
as the code worked well. Basic setup is: 1XUpgradedArduino, 1XWaveShield, 1X10KPotentiometer
and 1XLDR plus a few sample wav files from Max5.
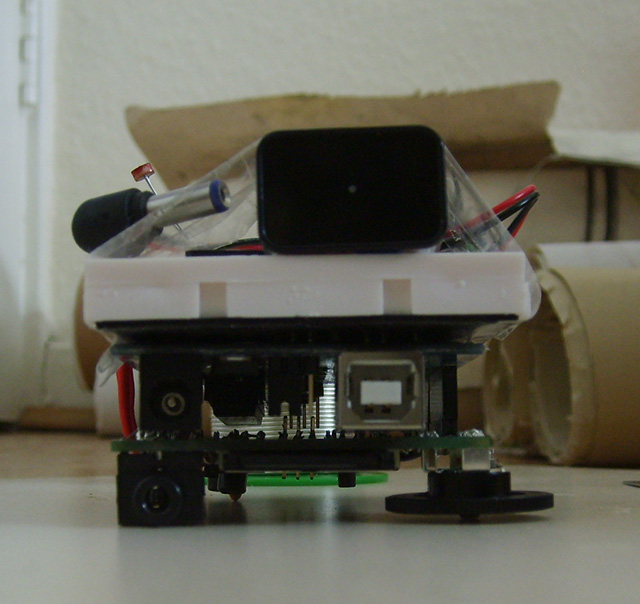
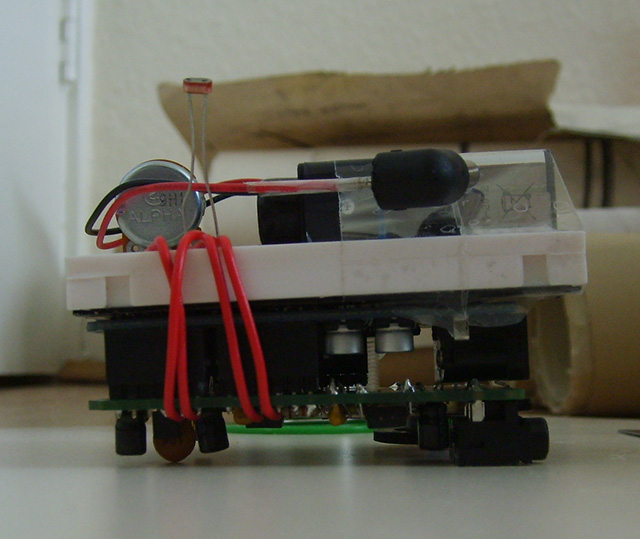
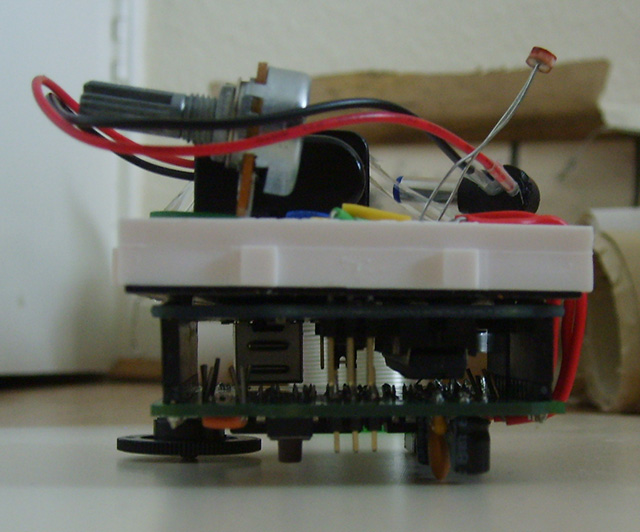
I've decided to wrap the thing up a bit so it's not connected to the computer anymore.
Here are the new images:
And here is a badly filmed short video:
The code for waveshield:
#include <FatReader.h>
#include <SdReader.h>
#include <avr/pgmspace.h>
#include "WaveUtil.h"
#include "WaveHC.h"


SdReader card;    // This object holds the information for the card
FatVolume vol;    // This holds the information for the partition on the card
FatReader root;   // This holds the information for the filesystem on the card
FatReader f;      // This holds the information for the file we're play

WaveHC wave;      // This is the only wave (audio) object, since we will only play one at a time

#define DEBOUNCE 5  // button debouncer

//sensor setup
int vals[10];//for averaging capacitive sensor
int16_t lastpressval = 0;
#define HYSTERESIS 3

// this handy function will return the number of bytes currently free in RAM, great for debugging!
int freeRam(void)
{
  extern int  __bss_end;
  extern int  *__brkval;
  int free_memory;
  if((int)__brkval == 0) {
    free_memory = ((int)&free_memory) - ((int)&__bss_end);
  }
  else {
    free_memory = ((int)&free_memory) - ((int)__brkval);
  }
  return free_memory;
}

void sdErrorCheck(void)
{
  if (!card.errorCode()) return;
  putstring("\n\rSD I/O error: ");
  Serial.print(card.errorCode(), HEX);
  putstring(", ");
  Serial.println(card.errorData(), HEX);
  while(1);
}

void setup() {
  byte i;

  // set up serial port
  Serial.begin(9600);
  putstring_nl("WaveHC with sensor control");
  //Serial.print(NUMBUTTONS, DEC);
  //putstring_nl("buttons");

  putstring("Free RAM: ");       // This can help with debugging, running out of RAM is bad
  Serial.println(freeRam());      // if this is under 150 bytes it may spell trouble!

  // Set the output pins for the DAC control. This pins are defined in the library
  pinMode(2, OUTPUT);
  pinMode(3, OUTPUT);
  pinMode(4, OUTPUT);
  pinMode(5, OUTPUT);

  // pin13 LED
  pinMode(13, OUTPUT);

 //init averaging array
  for(int i=0 ; i < 10 ; i++) vals[i] = 0;

  //  if (!card.init(true)) { //play with 4 MHz spi if 8MHz isn't working for you
  if (!card.init()) {         //play with 8 MHz spi (default faster!)
    putstring_nl("Card init. failed!");  // Something went wrong, lets print out why
    sdErrorCheck();
    while(1);                            // then 'halt' - do nothing!
  }

  // enable optimize read - some cards may timeout. Disable if you're having problems
  card.partialBlockRead(true);

// Now we will look for a FAT partition!
  uint8_t part;
  for (part = 0; part < 5; part++) {     // we have up to 5 slots to look in
    if (vol.init(card, part))
      break;                             // we found one, lets bail
  }
  if (part == 5) {                       // if we ended up not finding one  :(
    putstring_nl("No valid FAT partition!");
    sdErrorCheck();      // Something went wrong, lets print out why
    while(1);                            // then 'halt' - do nothing!
  }

  // Lets tell the user about what we found
  putstring("Using partition ");
  Serial.print(part, DEC);
  putstring(", type is FAT");
  Serial.println(vol.fatType(),DEC);     // FAT16 or FAT32?

  // Try to open the root directory
  if (!root.openRoot(vol)) {
    putstring_nl("Can't open root dir!"); // Something went wrong,
    while(1);                             // then 'halt' - do nothing!
  }

  // Whew! We got past the tough parts.
  putstring_nl("Ready!");

  TCCR2A = 0;
  TCCR2B = 1<<CS22 | 1<<CS21 | 1<<CS20;

  //Timer2 Overflow Interrupt Enable
  TIMSK2 |= 1<<TOIE2;


}

SIGNAL(TIMER2_OVF_vect) {
}

void loop() {
  byte i;

  int track = int(analogRead(0) / 170.67);
  if(track == 0) playcomplete("4RAINS~1.WAV");
  if(track == 1) playcomplete("5CELLO.WAV");
  if(track == 2) playcomplete("6ANTON.WAV");
  if(track == 3) playcomplete("3SHO0630.WAV");
  if(track == 4) playcomplete("1DRUML~1.WAV");
  if(track == 5) playcomplete("2JONGLY.WAV");
}

// Plays a full file from beginning to end with no pause.
void playcomplete(char *name) {
  //store pressure value and newsamplerate
  int16_t pressval;
  uint32_t newsamplerate;
  // call our helper to find and play this name
  playfile(name);
  while (wave.isplaying) {
    pressval = abs(16000 - (average(analogRead(1)) * 456.25));//inverted, nomalized, avreahed, scaled
    if ( ((pressval - lastpressval) > HYSTERESIS) || ((lastpressval - pressval) > HYSTERESIS)) {
        newsamplerate = pressval;                       // scale it by the analog value
        wave.setSampleRate(newsamplerate);  // set it immediately!
        Serial.println(newsamplerate, DEC);  // for debugging
        lastpressval = pressval;
    }
  }
  // now its done playing
}

void playfile(char *name) {
  // see if the wave object is currently doing something
  if (wave.isplaying) {// already playing something, so stop it!
    wave.stop(); // stop it
  }
  // look in the root directory and open the file
  if (!f.open(root, name)) {
    putstring("Couldn't open file "); Serial.print(name); return;
  }
  // OK read the file and turn it into a wave object
  if (!wave.create(f)) {
    putstring_nl("Not a valid WAV"); return;
  }

  // ok time to play! start playback
  wave.play();
}

int average(int newVal){
  int total = 0;
  for(int i = 9; i > 0; i--) {
    vals[i] = vals[i-1];
    total += vals[i];
  }
  vals[0] = newVal;
  total += vals[0];
  return total *= .1;
}
A few more links
Along the way I've stumbled on a few interesting resources:
ArduinoBoy - Gameboy <> Arduino library
- Touch Screen on GBA
- Nice Arduino presentation including nice tips like:
- Freeduino - open-source Arduino-compatible
And that's it!
